
Add signers to a template
Signers are the people who will complete the signing fields when a template is used in a signing request.
When preparing a template, you define the signer roles and assign fields to those roles. The actual people who will sign can then be selected when the template is used to create a signing request.
For example, a template for an agreement might have two signer roles: Customer and Company Representative. Each role can have its own fields, and the actual names and email addresses can be provided when sending the request.
1. Add signer roles
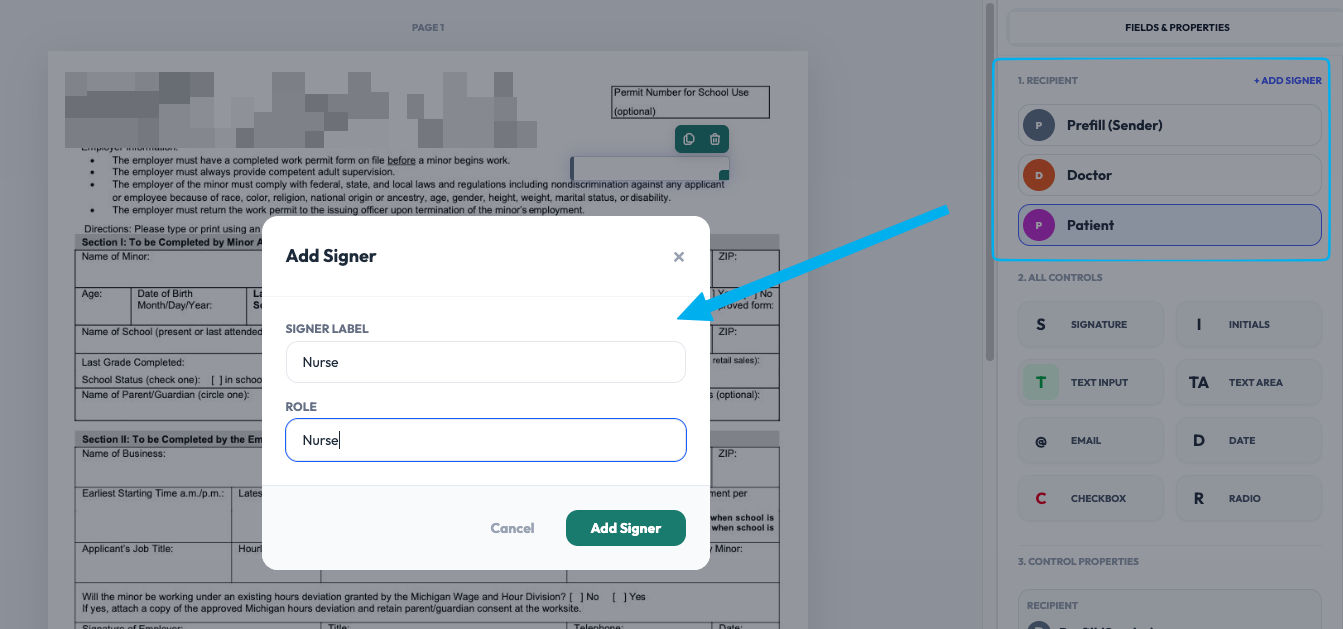
Open the template editor and add the signer roles required for the document.
Give each role a clear name that describes who is expected to sign, such as:
- Customer
- Employee
- Manager
- Company Representative
- Witness
The roles help you organize the template and determine which fields belong to which signer.
2. Assign fields to a signer
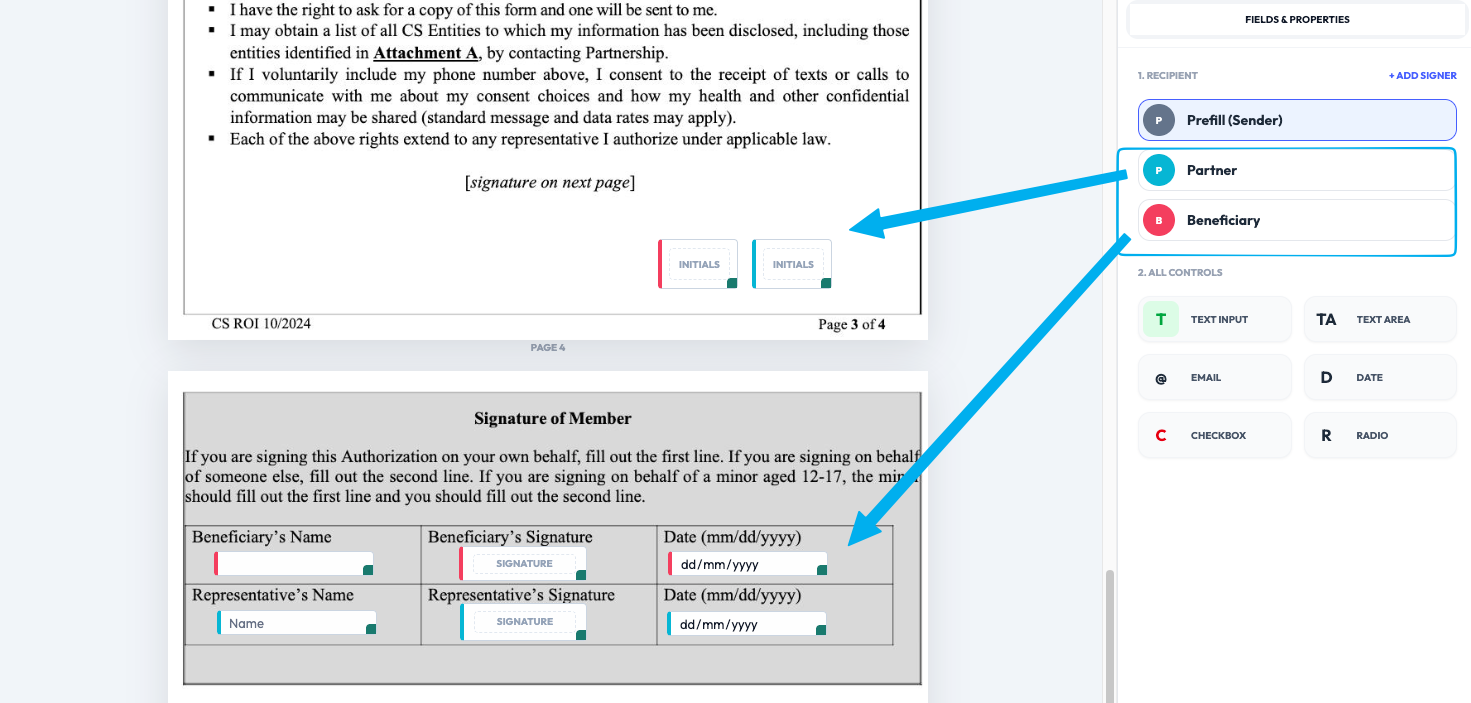
Once the signer roles are defined, assign each signing field to the appropriate signer.
For example, in an agreement with a Customer and Company Representative:
- The customer's signature field is assigned to Customer.
- The company's signature field is assigned to Company Representative.
- Any fields that each person needs to complete are assigned to their respective role.
When the template is used for a signing request, Undersign uses these assignments to determine which person is responsible for each field.
See Configure Fields.
3. Define the actual signers when sending
The signer roles in a template do not necessarily represent specific people.
When you create a signing request from the template, you provide the name and email address of the person who will fill each signer role.
For example:
Template
- Customer
- Company Representative
Signing Request 1
- Customer → John Smith
- Company Representative → Sarah Jones
Signing Request 2
- Customer → Maria Garcia
- Company Representative → Sarah Jones
The same template can therefore be reused for different people without changing the field setup.
You can also select people from your Contacts instead of entering their details manually.
4. Configure signing order
If multiple people need to sign, you can choose whether they can sign independently or must sign in a particular order.
With sequential signing, for example, the Customer can be required to sign first, followed by the Company Representative.
The signing order can be configured as part of the template or when creating the signing request, depending on your workflow.
See Signing Order.
In simple terms
A template defines the signer roles and what each signer needs to do. When you create an actual signing request, you assign real people to those roles.
Template: Customer → fields assigned to Customer
Signing request: Customer → John Smith
This lets you prepare the signing workflow once and reuse it for different recipients.