
Send your first signing request
Learn how to prepare and send a document for signature in Undersign. This guide walks you through selecting a document, configuring the signing experience, adding signers and prefilled information, and sending the signing request.
1. Upload a document and create a template
From the dashboard, go to Templates, click Add Template, and upload the PDF you want to send for signature. A template lets you define the document layout, fields, and signer setup once and reuse it for future signing requests.
If you already have a template, you can use it directly when creating a signing request.
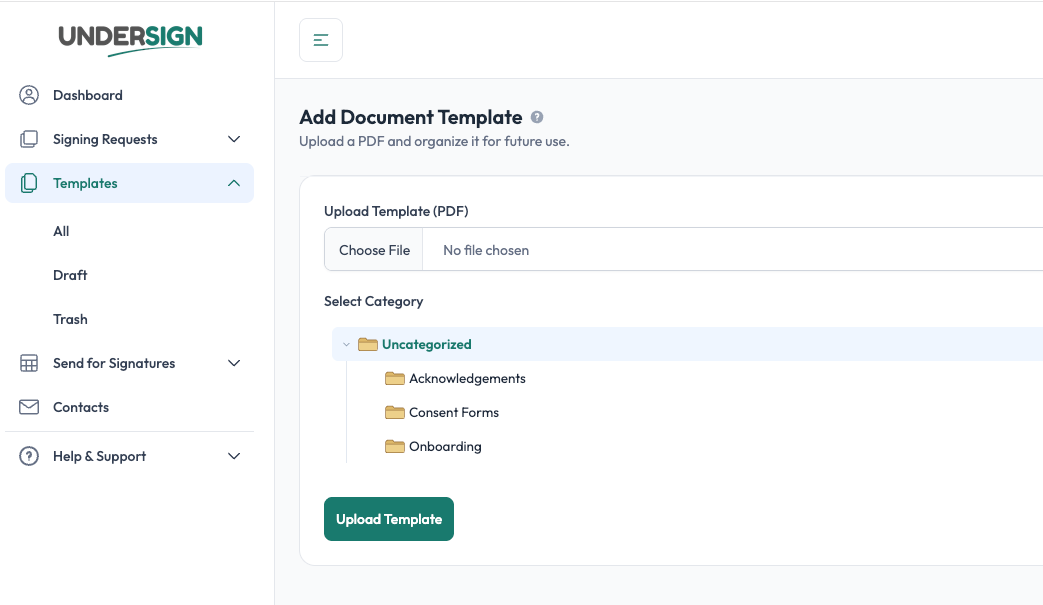
See Create a template.
2. Add fields to the document
Open the template and add the fields the signer needs to complete. You can add fields such as:
- Signature
- Initials
- Date
- Text
- Checkbox
Place each field where it should appear on the document and configure its properties as needed.
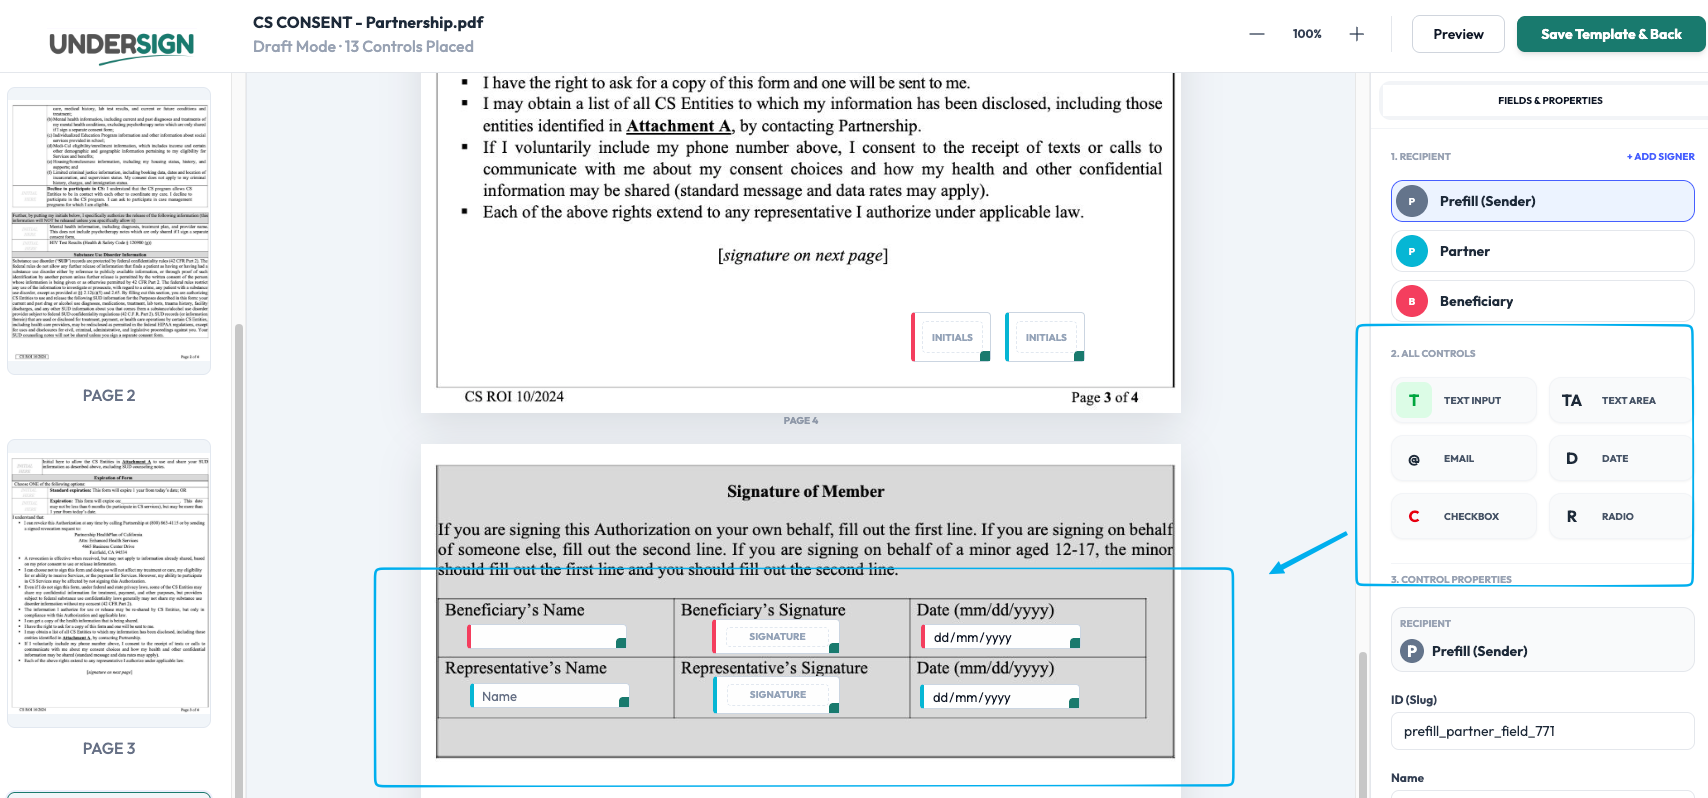
See Add fields and Fields.
3. Select the document for signing
When you're ready to create a signing request, select the template or document you want to send.
Undersign can also include multiple documents in the same signing request, so you can send a set of documents together when required.
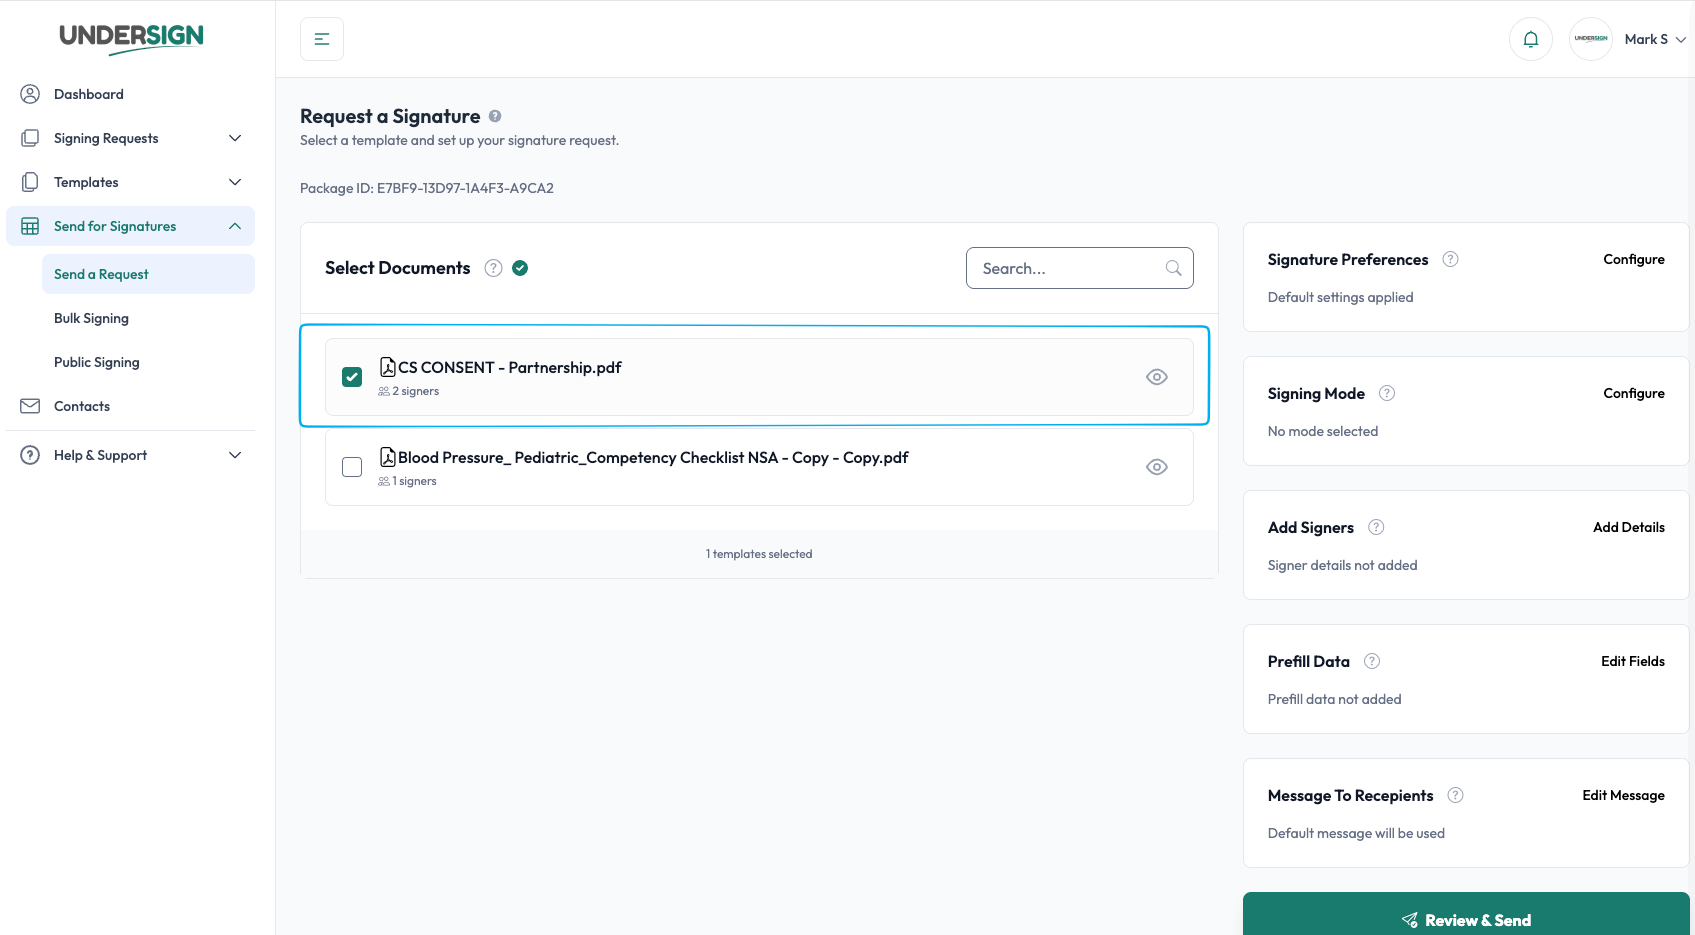
4. Configure signature preferences
Open Preferences for the signing request. Enable Sequential signing when signers must sign in order; when off, all signers can sign in any order.
Enable Field Visible to let every signer see all fields and filled information; when off, no signer will see information filled in by others.
Select Apply Preferences to save your choices.
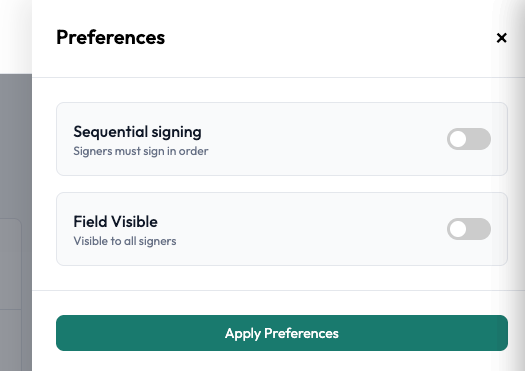
See Signing order.
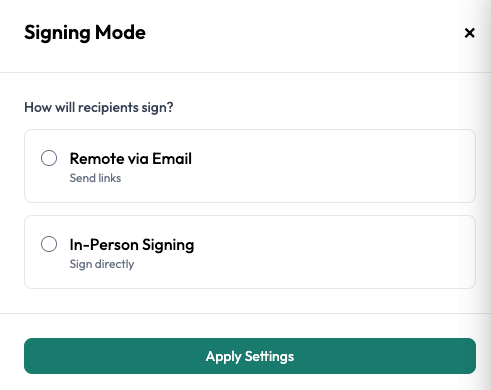
5. Configure the signing mode
Choose how recipients will sign.
Remote via Email sends each signer a link so they can sign from their own device.
In-Person Signing lets signers sign directly on your device, one after another.
Select Apply Settings to confirm your choice.
6. Add signers
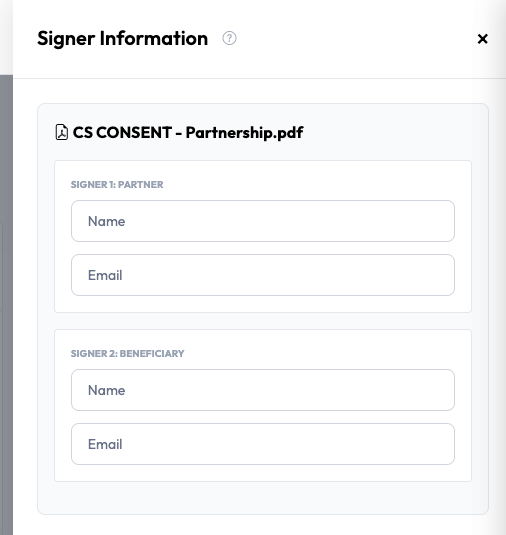
Add each person who needs to participate in the signing request and provide their name and email address.
See Add signers.
7. Add prefilled information
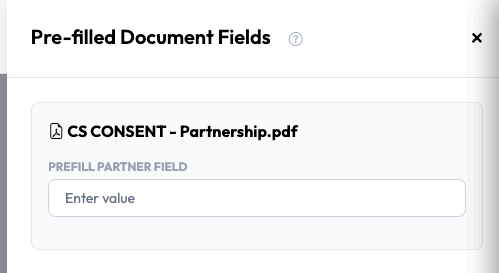
Use Prefill Data to enter information that should already be available in the document before the signer opens it.
Prefilled fields are useful for information you already know, such as a customer's name, reference number, address, or other details. The signer does not need to enter information that has already been prefilled.
Review the prefilled fields before sending to make sure the information is correct.
8. Add a message for recipients
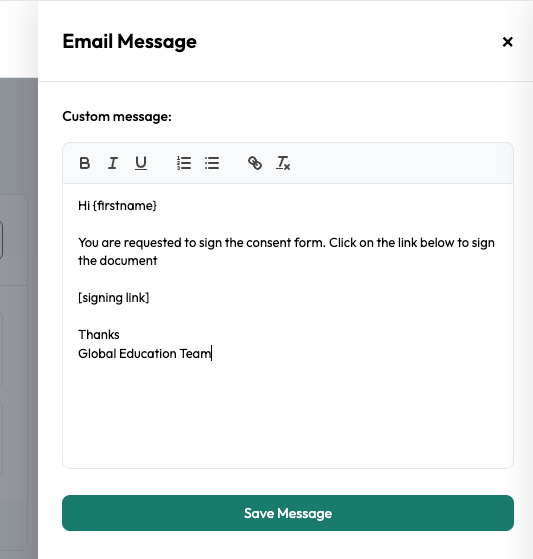
Undersign provides a default message for the signing request. You can edit the message if you want to provide additional instructions or context to the recipients.
9. Review and send
Once the documents, signing settings, signers, fields, prefilled information, and message are ready, select Review & Send.
Review the signing request carefully before sending it. When you send it, Undersign creates the signing request and sends the recipients a secure link to review and sign by email.
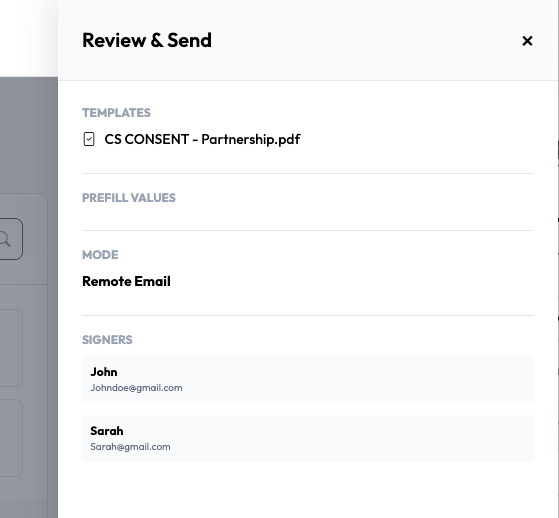
See Send for signature.
10. Track the signing request
After sending, you can track the signing request and see its current status from Sent Documents.
Once all required signers have completed their fields, the signing request is marked Completed and the completed documents and signing records are generated.
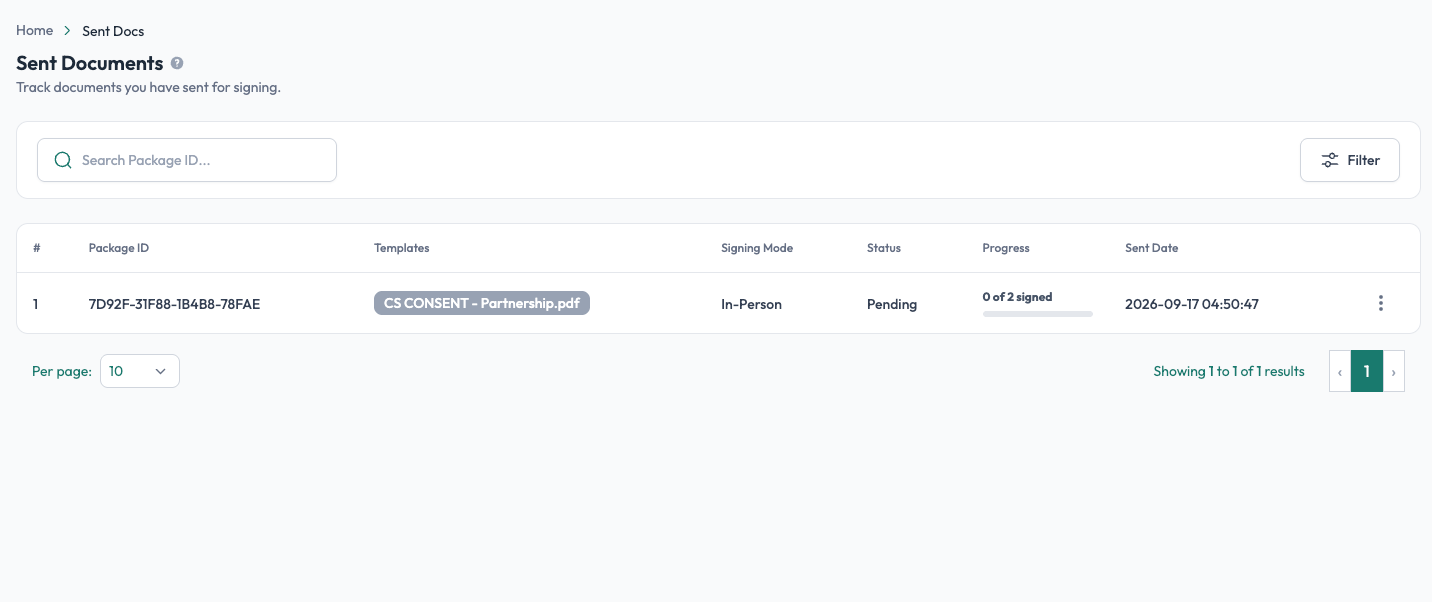
See Sent Documents.
Pro tip: Send the signing request to yourself first. Using a second email address as the signer lets you go through the complete signing process and see exactly what your recipient will experience, including the completed document and completion certificate.