
Document fields
Fields are the interactive elements you add to a template to collect information from signers. They define where a signer needs to sign, enter information, select an option, or provide other required details.
Adding fields turns a static document into a form that guides each signer through what they need to complete.
Field types
Undersign provides several field types for different kinds of information:
| Field | What it captures |
|---|---|
| Signature | A signer's signature, entered by typing or drawing. |
| Initials | A signer's initials, typically used where a signer needs to acknowledge specific pages or sections. |
| Text Input | A single-line text value such as a name, reference number, or short answer. |
| Text Area | Longer or multi-line text, such as an address, explanation, or additional information. |
| An email address entered by the signer. | |
| Date | A date entered by the signer or populated through prefill. |
| Checkbox | A selectable checkbox used for confirmations or choices. |
| Radio | A selection control used when the signer needs to choose one option from a group. |
Add and place fields
When editing a template, select the field type you need and place it on the document where the signer should complete it.
Undersign provides visible guide lines while positioning fields. These guides help you align fields accurately with the appropriate areas of the underlying document, making it easier to create a clean and consistent signing form.
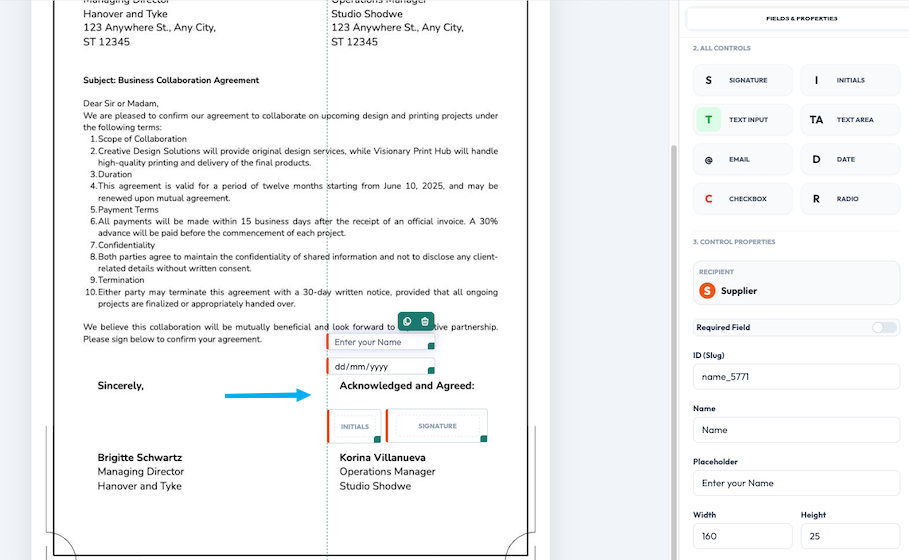
After placing a field, select it to configure its properties.
Field properties
Each field has its own properties that control how it behaves and how it appears to the signer.
Depending on the field type, you can configure properties such as:
- Recipient: determines which signer is responsible for completing the field.
- ID (Slug): a unique identifier for the field, useful when referring to fields programmatically or when working with integrations.
- Name: the field's descriptive name.
- Placeholder: optional guidance shown inside an empty input field.
- Width and Height: control the size of the field on the document.
- Required Field: determines whether the signer must complete the field before submitting.
Additional properties may be available depending on the type of field.
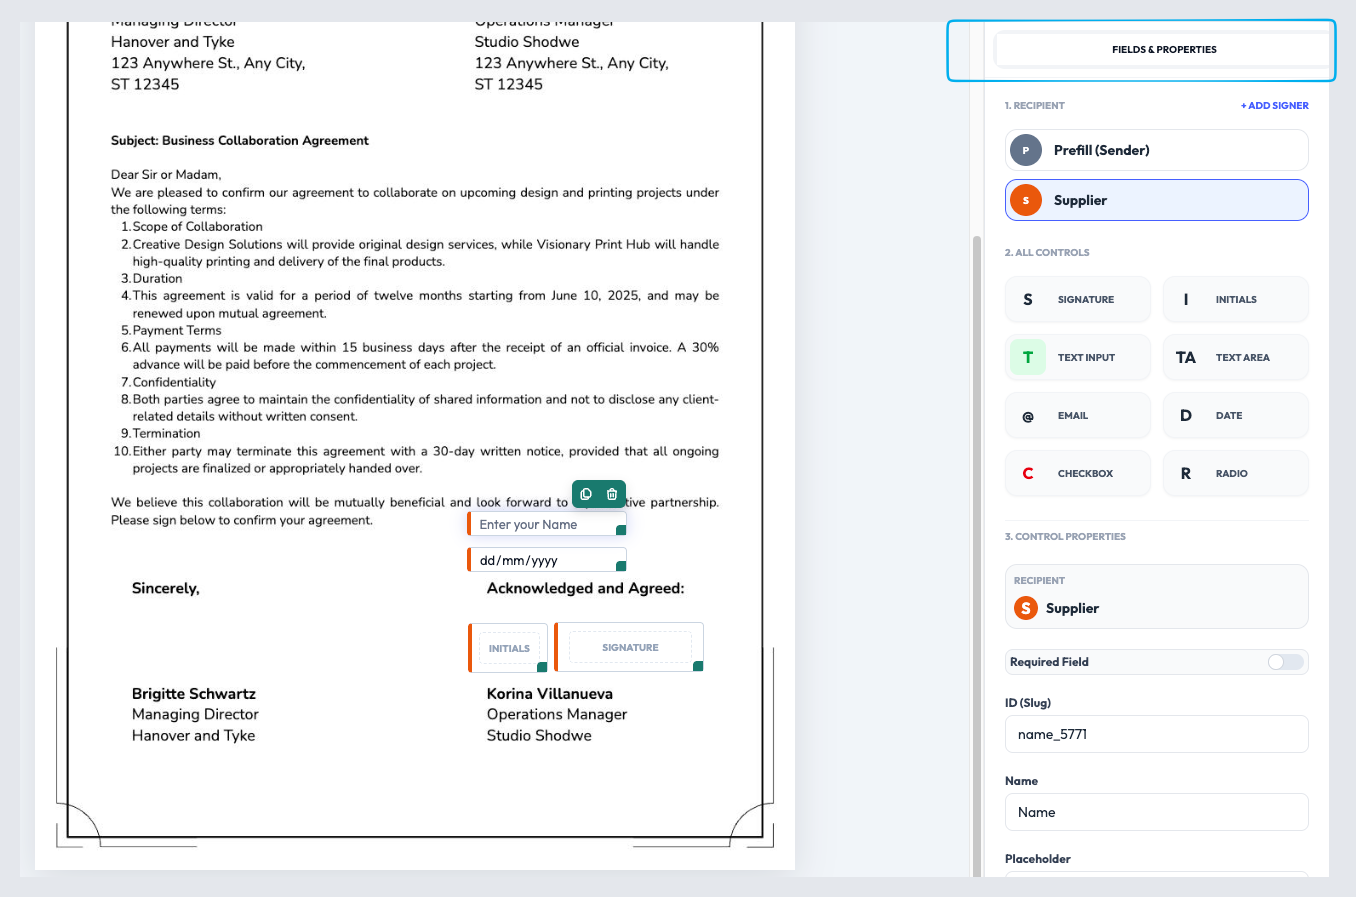
Duplicate or delete a field
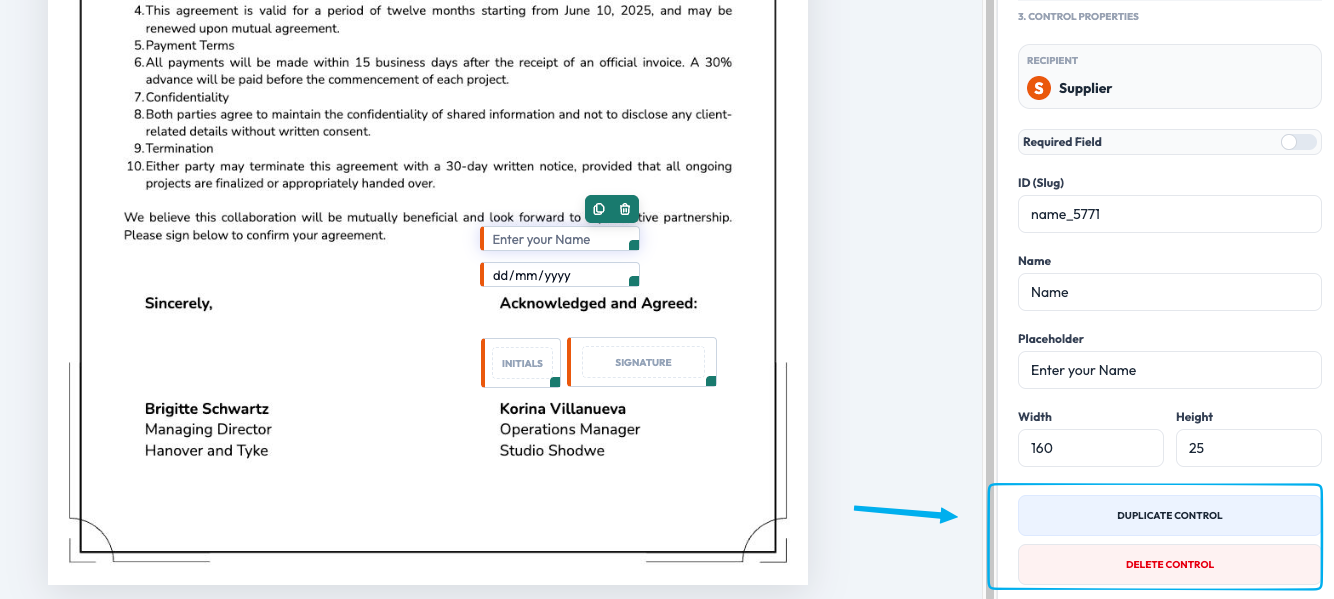
When a field is selected, you can use the available actions to:
Duplicate Control: create another copy of the selected field with the same configuration. This is useful when you need several similar fields.
Delete Control: remove the selected field from the template.
Assign fields to signers
Every field that a signer needs to complete should be assigned to the appropriate recipient.
For example, in a document requiring two signatures, you might assign the first signature field to Signer 1 and the second signature field to Signer 2. Each signer will then see and complete the fields assigned to them.
Required fields
Use Required Field when the signer must complete a field before they can submit the signing request.
Required fields cannot be skipped. During signing, Undersign guides the signer through the fields that still need to be completed.
Prefill fields
Some information may already be known before the signing request is sent. Instead of asking the signer to enter it again, you can provide the value using Prefill Fields.
For example, you can prefill a customer's name, reference number, or contract date. The signer will see the information already populated when they open the signing request.
Fields and signing experience
Fields determine what each signer needs to do and provide during signing. A well-configured template should therefore have:
Correct fields → Correct signer assignment → Appropriate properties → Appropriate visibility → Required fields where necessary
Once the fields are configured, the template can be saved as Fillable and reused for signing requests.