
Create a template
Create a reusable signing template by uploading a document and preparing it with the fields and signer setup required for signing. Once prepared, the same template can be reused for multiple signing requests.
1. Upload your document
Go to Templates and select + Add Template.
Choose the PDF document you want to use as a template, then select a Category to organize it.
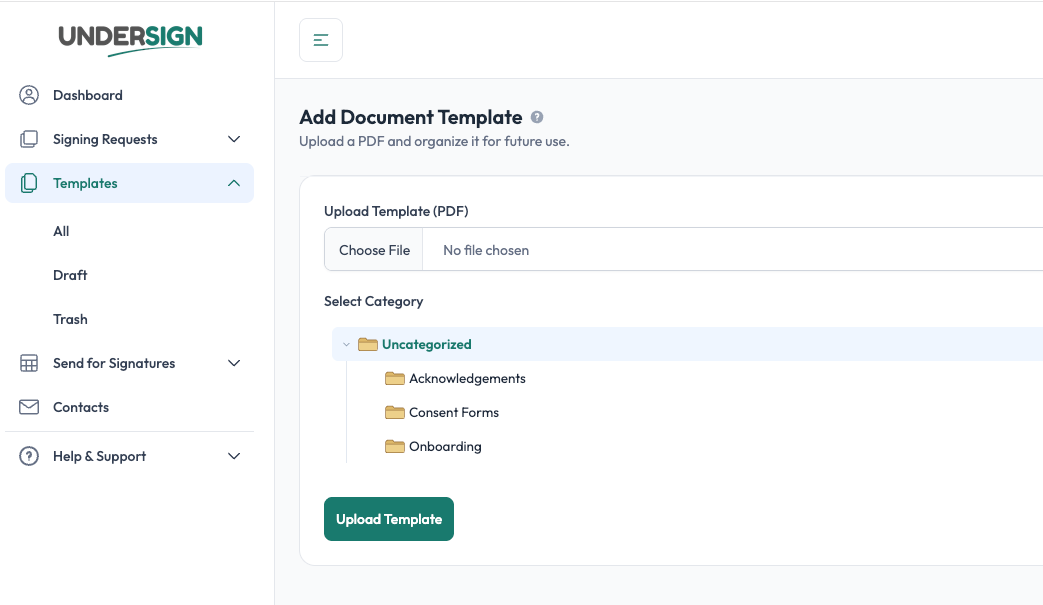
After uploading, the document appears in your Templates list as a Raw template.
A Raw template is only an uploaded document. It cannot be sent for signature until you prepare it with the required signing fields.
2. Add fields
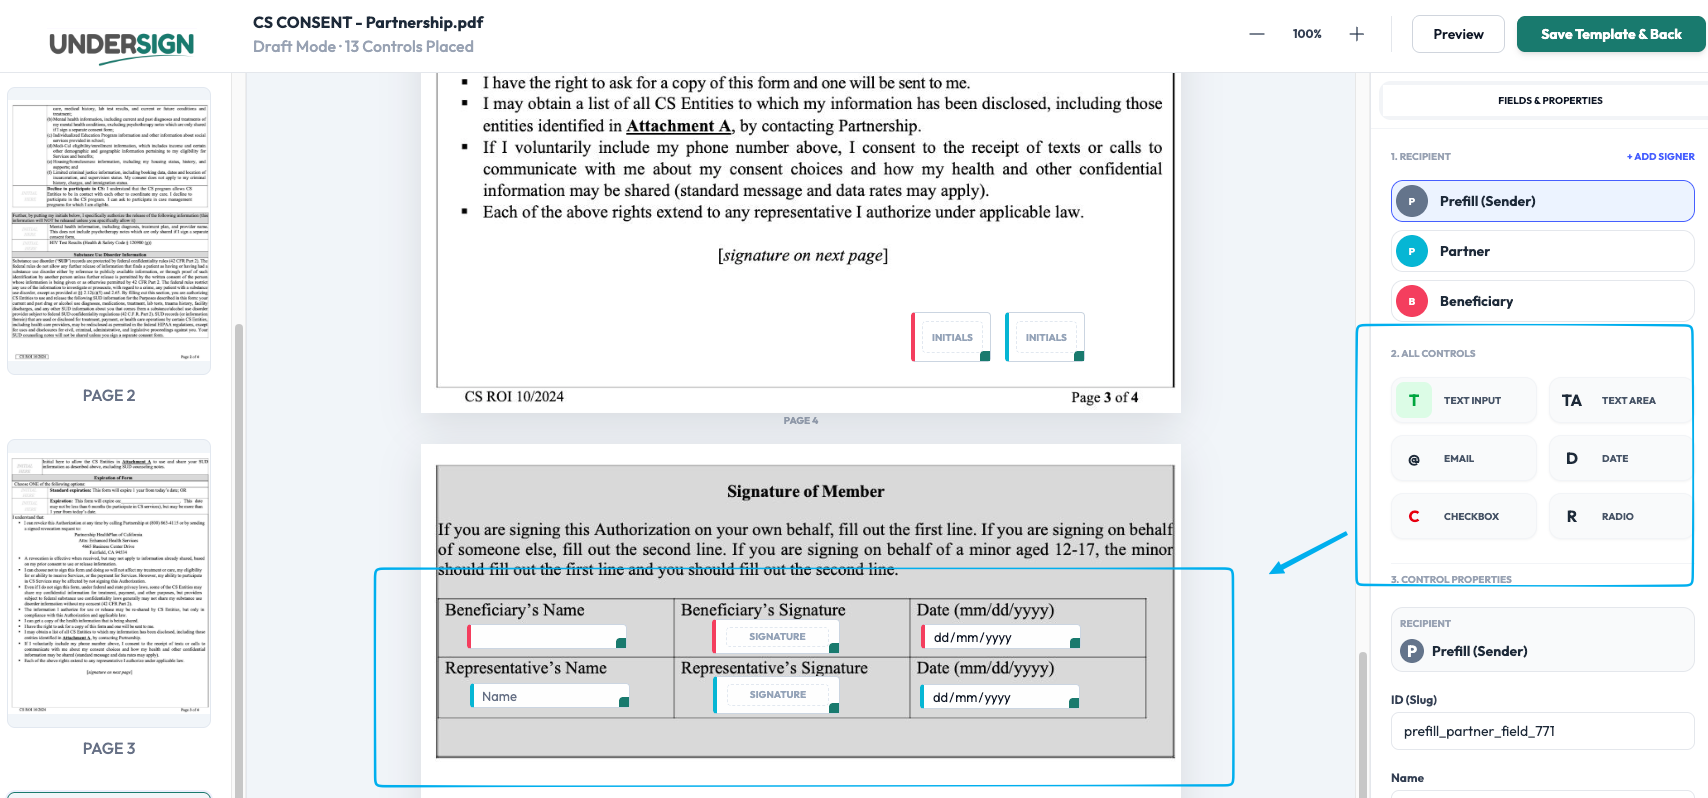
Open the template and add the fields that signers need to complete. You can add fields such as:
- Signature
- Initials
- Text Input
- Text Area
- Date
- Checkbox
- Radio
Place each field in the appropriate location on the document. Undersign provides visible guide lines to help you align fields accurately with the underlying document.
See Add Fields.
3. Configure the fields
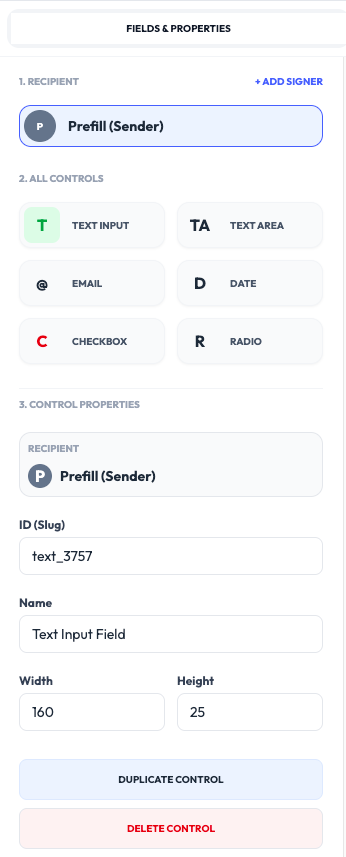
Select each field to configure its properties.
Depending on the field type, you can set options such as the field name, recipient, size, placeholder, and whether the field is required.
Make sure every field is assigned to the correct signer.
See Configure Fields.
4. Add signers
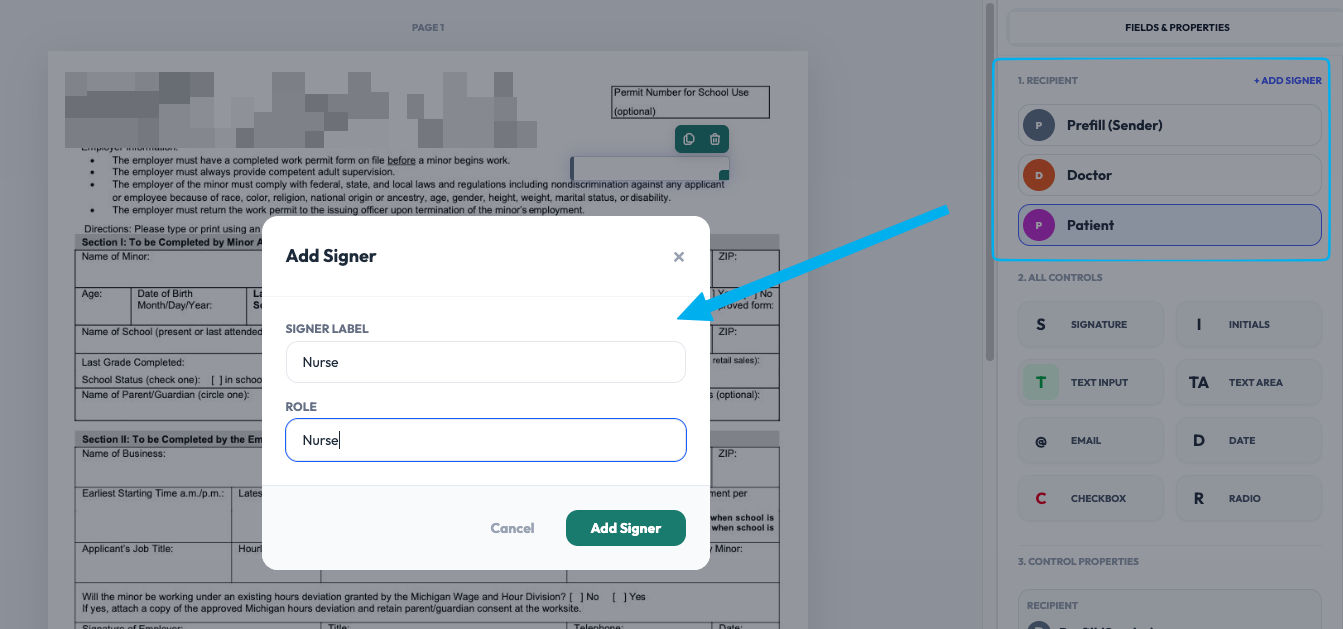
Define the signer roles that will be used when this template is sent.
For example, a contract might have Customer and Company Representative as its signer roles. When you later create a signing request, you assign actual people to these roles.
Assign each signer's fields to the appropriate signer.
See Add Signers.
5. Add prefill fields when needed
If some information will be supplied by you before each signing request, configure those fields so they can be prefilled when the request is created.
For example, one Event Waiver template could contain Event Date and Venue fields. When sending the template for a Boston event, you can prefill the venue as Boston; when sending it for a New York event, you can prefill it as New York. You can then reuse the same template for both events.
See Prefill Fields.
6. Save the template
Once the document has been prepared with its required fields and signer setup, save the template.
The template editor autosaves your changes every 5 seconds while you work. You can also select Save at any time to save manually.
A properly prepared template becomes Fillable and can be used to create signing requests.
If you are not ready to finish the setup, save it as a draft and continue working on it later.
Reuse the template
Once a template is Fillable, you can select it whenever you create a signing request.
You can reuse the same template for different signers and provide different prefilled information for each request, without uploading the document or configuring its fields again.
In simple terms:
Upload document → Raw template → Add fields & signer setup → Fillable template → Reuse for signing requests