How bulk signing works
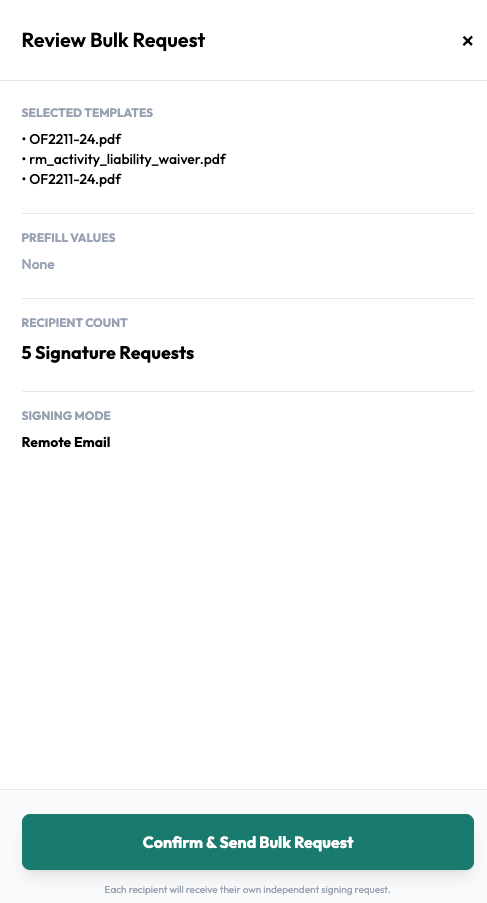
A bulk operation runs through seven steps: select templates, name the batch, add recipients, validate, configure preferences, choose a signing mode, then review and create.
1. Select template(s)
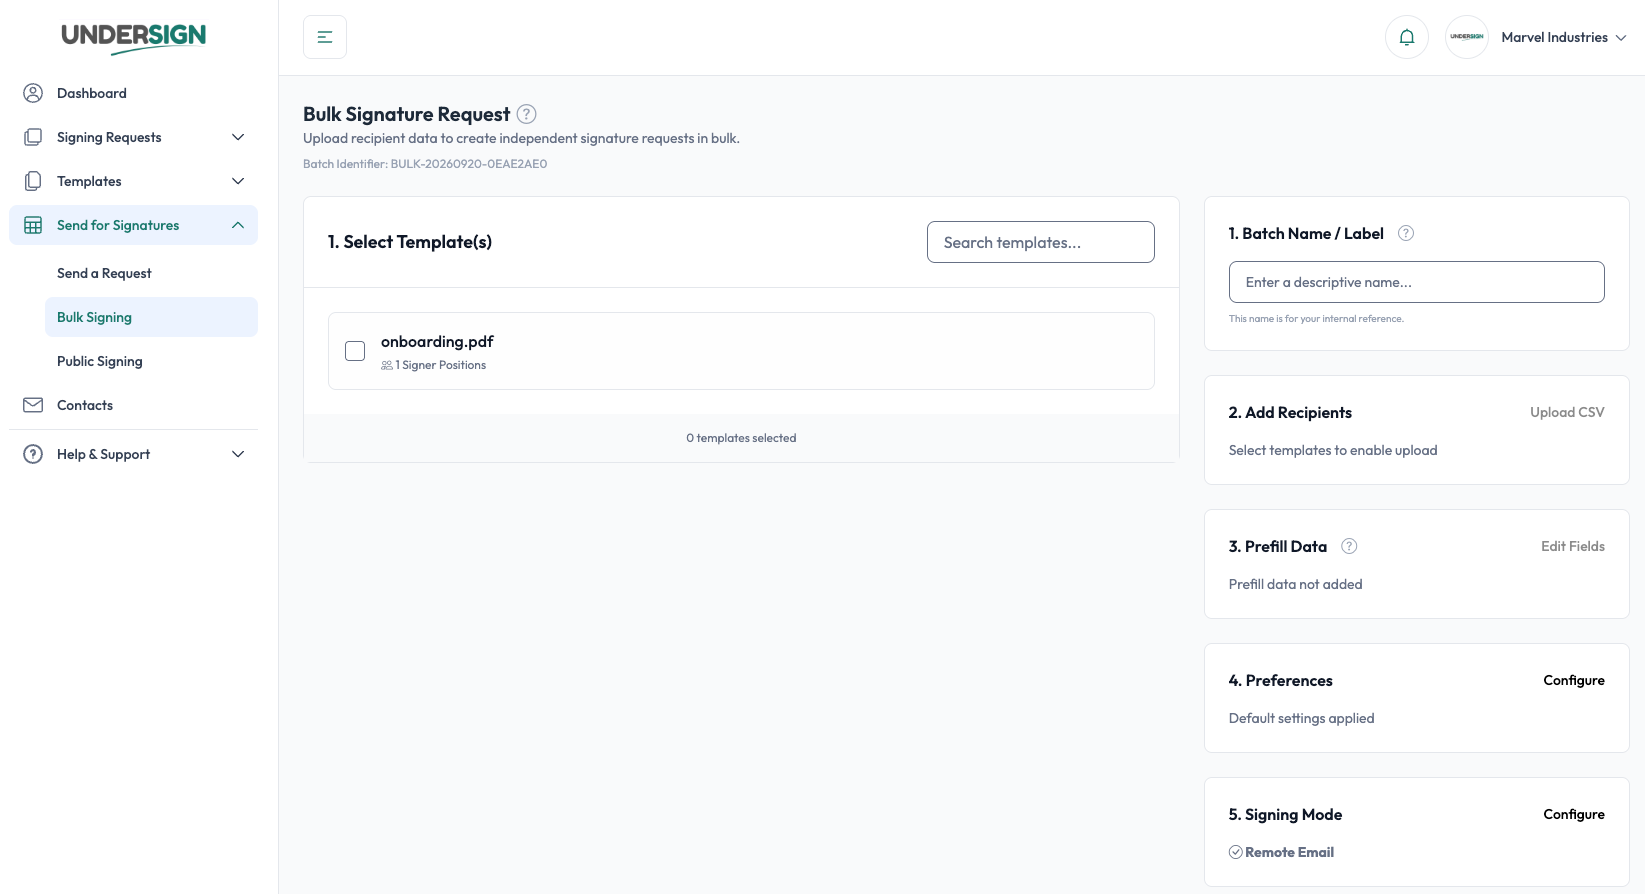
Start by selecting the saved template or templates that should be used for the bulk requests.
Only templates that are available for use in signature requests can be selected.
The selected templates determine:
- The documents included in each request
- The signer fields available to recipients
- The signer positions/roles required
- Any existing template configuration
If multiple templates are selected, the selected documents are included together in each generated signature request.
You can search for templates using the Search templates... field. After selecting templates, Undersign enables the recipient upload step.
2. Give the batch a name
Enter a Batch Name / Label to identify the bulk operation internally.
For example:
September Employee Agreements2026 Vendor RenewalsAnnual Compliance FormsQ4 Customer Agreements
The batch name is for your internal reference and makes it easier to identify the bulk request later in Bulk Signature History.
3. Add recipients
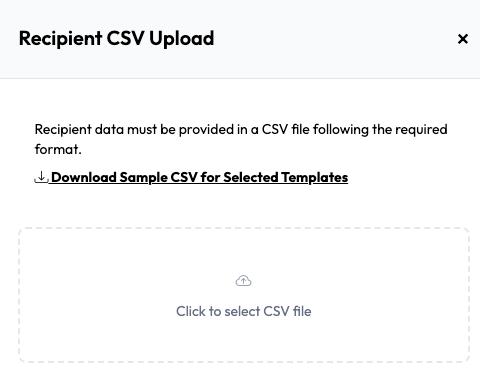
Recipient information is provided through a CSV file: one valid row creates one independent signature request.
A bulk batch supports a maximum of 100 independent signature requests.
See Preparing the recipient CSV for the full upload and validation workflow.
4. Validate the CSV
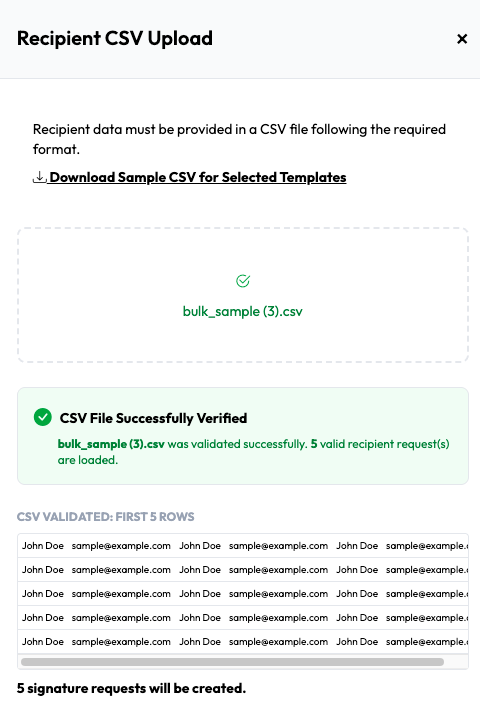
After selecting the CSV file, use Validate CSV & Save and correct any errors before proceeding. Validation must be completed before the batch is created.
See Preparing the recipient CSV for what validation checks.
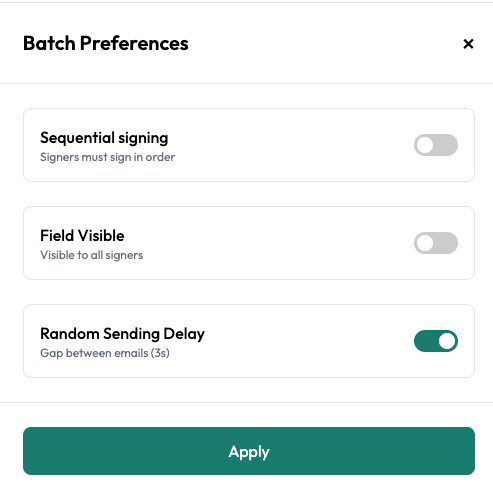
5. Configure preferences
Bulk Signing uses common preferences for the requests created from the batch. There are three preferences to configure:
- Sequential signing: signers must sign in order.
- Field Visible: field values are visible to all signers.
- Random Sending Delay: a 3-second gap between sending emails so that SMTP servers can handle the blast emails better.
The configured preferences are applied consistently to the generated requests unless a particular setting is determined by the selected template or signing mode.
6. Select the signing mode
Bulk Signing supports the available signing modes in Undersign.
The selected mode determines how recipients access their signature requests. For example, with Remote Email, each recipient receives their own signing request by email.
The important distinction is that the bulk operation does not create one shared document for all recipients. It creates separate signature requests for each recipient.
7. Review and create
Before creating the batch, review the selected:
- Templates
- Batch name
- Recipient data
- Preferences
- Signing mode
When everything is correct, create the bulk request. Undersign then creates the individual signature requests represented by the CSV rows.
Creating a bulk request is subject to storage validation: the system estimates the storage the batch will require and blocks creation if it exceeds your quota. For example, with 500 MB available, a batch needing 750 MB cannot be created. Reduce the number of requests or add storage. This protects the system against abuse under the fair-use policy.