
Complete your first signature
This guide explains what a signer sees when they open a signing request, how to complete the required fields, and how to submit the signed documents.
No Undersign account or software download is required to sign a document.
1. Open the signing request
The signer receives an email with a secure link to the signing request. Selecting the link opens the signing page in a web browser.
No account or app is required to access the signing page.
2. Review the documents
The signing page displays the document along with its pages. Signers can move between pages using the page thumbnails on the left and review the document before completing any fields.
The top of the page shows the signing progress and the signer's name.
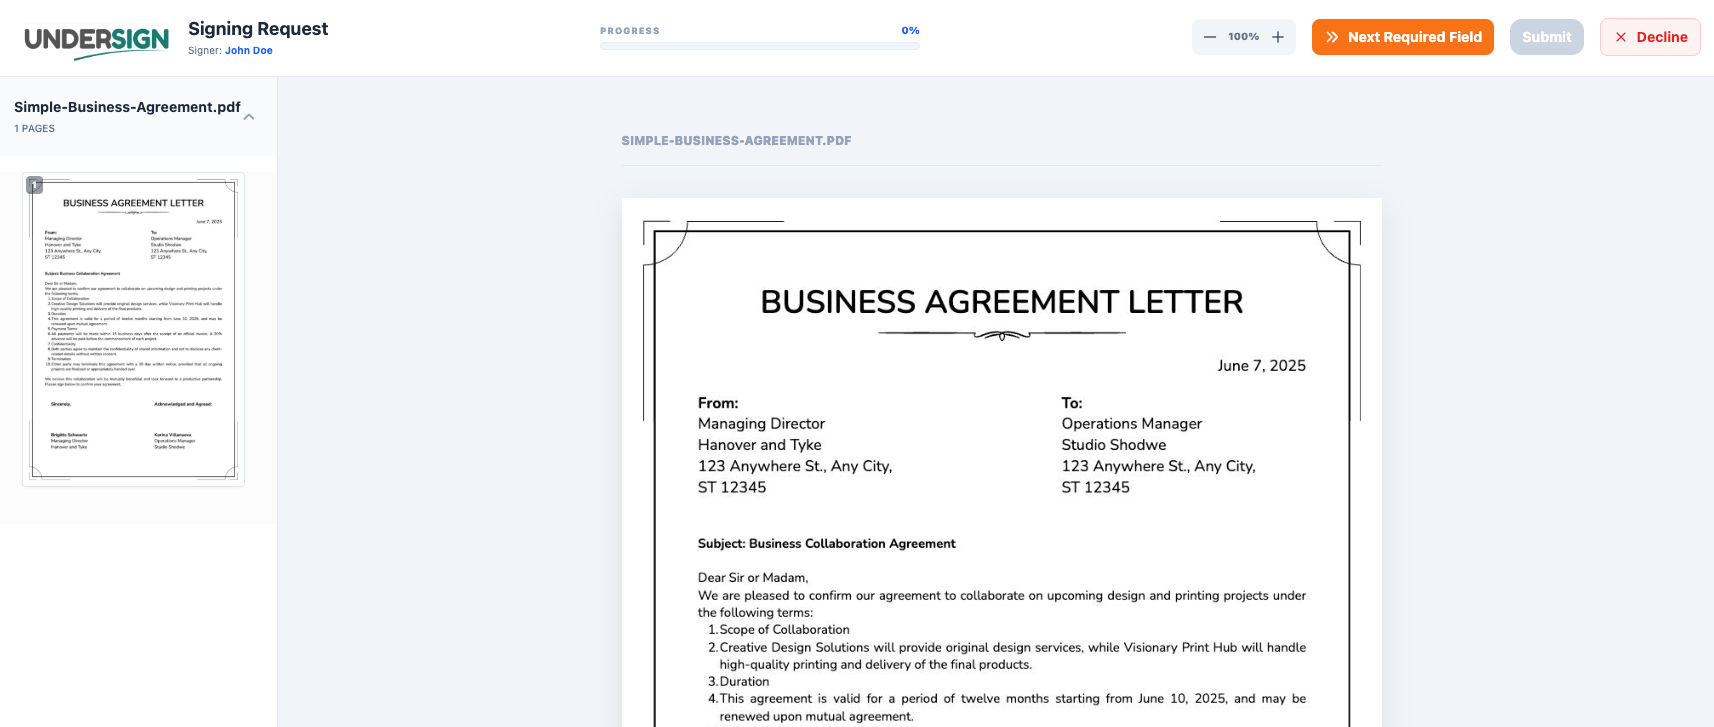
Review the document carefully before completing the required fields.
3. Complete the required fields
Fields assigned to the signer appear on the document and must be completed before the request can be submitted. Depending on the document, these may include signature, initials, date, text, checkbox, or other fields.
The Next Required Field button at the top of the page takes you directly to the next required field that needs to be completed.
You can also move between fields using the Tab key on your keyboard.
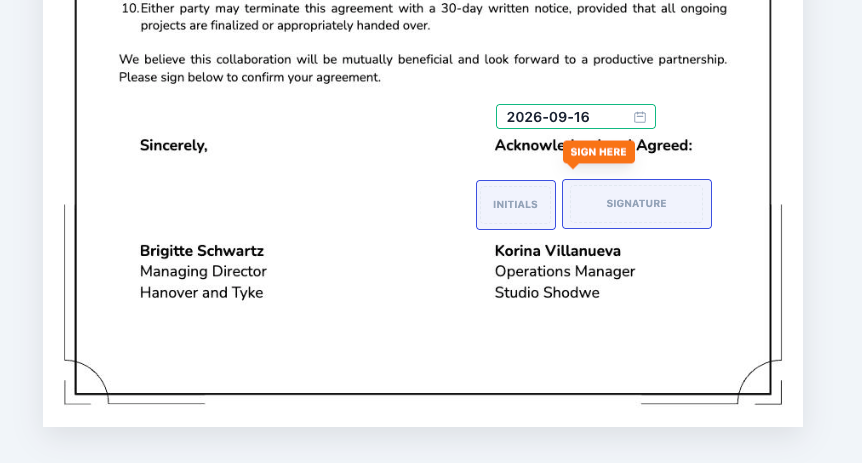
Complete all required fields before submitting the signing request.
4. Add your signature
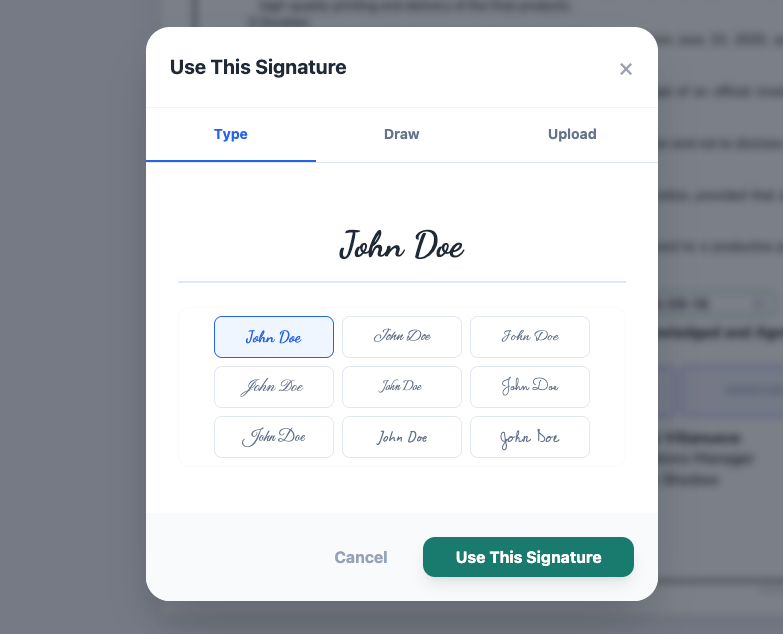
When you reach a signature field, select the field to enter your signature. Depending on the available options, you may be able to type or draw your signature.
Complete any other fields assigned to you, such as initials, dates, text fields, or checkboxes.
5. Submit the signing request
Once all required fields have been completed, the Submit button becomes available.
Review your entries and select Submit to complete your part of the signing request.
If there are multiple signers, the signing request may continue to the next signer depending on the configured signing order.
If you don't want to sign
If you do not want to sign the signing request, you can choose to Decline it instead.
When a signing request is declined, the sender is notified and the request is marked as declined.
After signing is complete
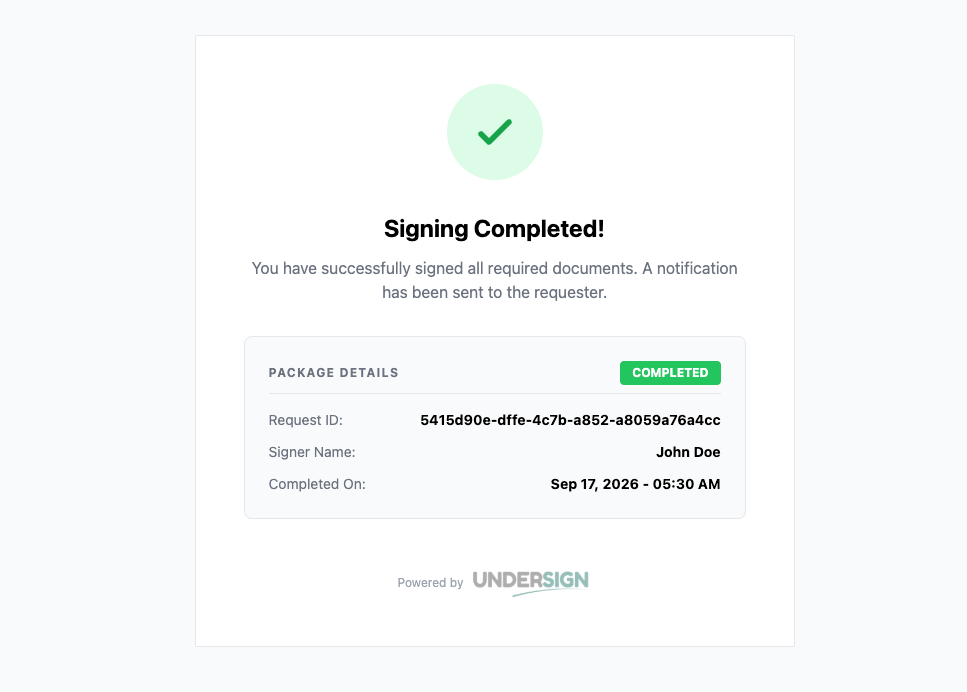
Once all required signers have completed the signing request, the request is marked Completed. The completed documents, audit trail, and completion certificate are generated automatically.
The sender can access completed documents from Completed Documents.
Tip: If you're testing your signing workflow for the first time, send a request to yourself using a different email address. This lets you experience the complete signer journey before sending a request to a real recipient.