
API keys
API keys provide secure access to the Undersign API, allowing your applications and external systems to interact with your account programmatically.
For example, an integration can use an API key to create signature requests, check signing status, and work with documents without requiring a user to log in to the Undersign interface.
These settings are available under Account Settings → API Keys.
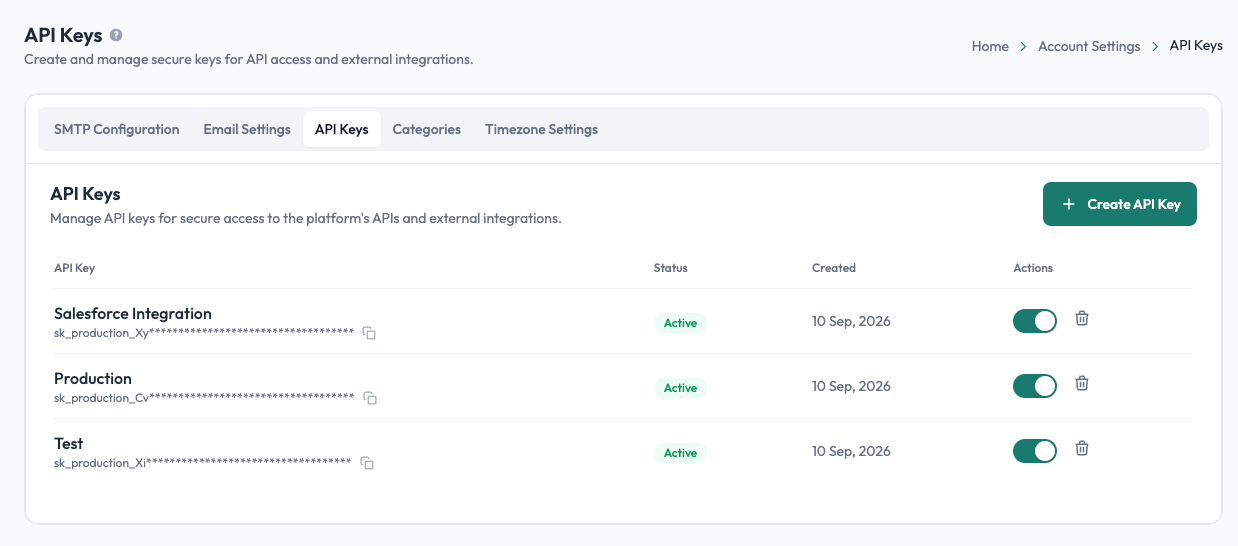
Creating an API key
Select Create API Key and provide a name that helps you identify what the key is used for, such as Production, Postman, or the name of an application or integration.
Each key is displayed in the API Keys list with:
- Name: the label you gave the key.
- API Key: the key used to authenticate API requests. The key is partially hidden for security.
- Status: whether the key is currently active or inactive.
- Created: when the key was created.
- Actions: enable or disable the key, or delete it.
Active and inactive keys
An API key can be Active or Inactive.
| Status | Meaning |
|---|---|
| Active | The key can be used to authenticate API requests. |
| Inactive | The key has been disabled and can no longer be used for API access. |
You can deactivate a key without deleting it. This is useful when temporarily stopping an integration or investigating an issue.
Managing API keys
Use the controls in the Actions column to manage your keys.
- Deactivate a key when it should no longer be usable.
- Reactivate an inactive key when access is needed again.
- Delete a key when it is no longer required.
Give each key a meaningful name so you can identify which integration or application it belongs to.
Keep your API keys secure
Treat an API key like a password. Store it securely on your server and never expose it in browser-side code, mobile applications, public repositories, or client-facing pages.
If a key may have been exposed, deactivate it immediately and create a new key for the affected integration.
See the API Reference for information about using API keys with the Undersign API.