
Add fields to a template
Fields are the interactive elements you place on a template to make a document ready for signing. They define where signers enter information, make selections, or provide their signature.
A template can contain different types of fields, and each field can be assigned to the signer who needs to complete it.
1. Choose and place a field
Open the template in the editor and select the field type you need from the Fields & Properties panel.
Place the field on the document where the signer should complete it. You can move and resize fields to position them correctly over the relevant area of the document.
Undersign provides visible guide lines while positioning fields to help you align them accurately with the document's existing text, lines, boxes, or other areas.
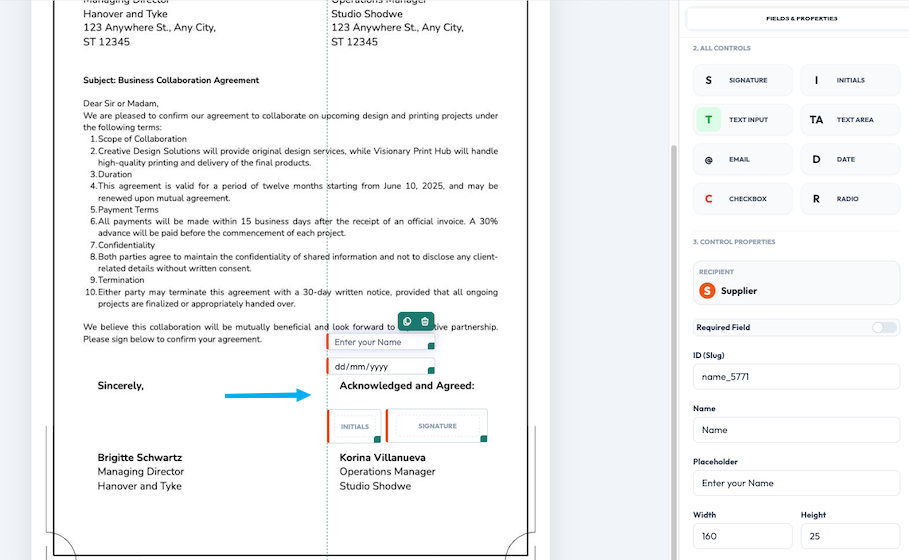
2. Available field types
Undersign provides the following field types:
| Field | Use for |
|---|---|
| Signature | Collecting the signer's signature. |
| Initials | Collecting the signer's initials, such as for specific pages or sections. |
| Text Input | Short, single-line information such as names, reference numbers, or short answers. |
| Text Area | Longer or multi-line information such as addresses, descriptions, or explanations. |
| Collecting an email address from the signer. | |
| Date | Collecting a date, such as the date of signing or another relevant date. |
| Checkbox | Allowing the signer to confirm something or select an option. |
| Radio | Allowing the signer to select one option from a group of choices. |
3. Configure field properties
After adding a field, select it to view and edit its properties.
Depending on the field type, you can configure properties such as:
- Recipient: the signer responsible for the field.
- ID (Slug): the unique identifier for the field.
- Name: a descriptive name for the field.
- Placeholder: guidance displayed inside an empty input field.
- Width and Height: the size of the field on the document.
- Required Field: whether the signer must complete the field before submitting.
Different field types may have additional properties.
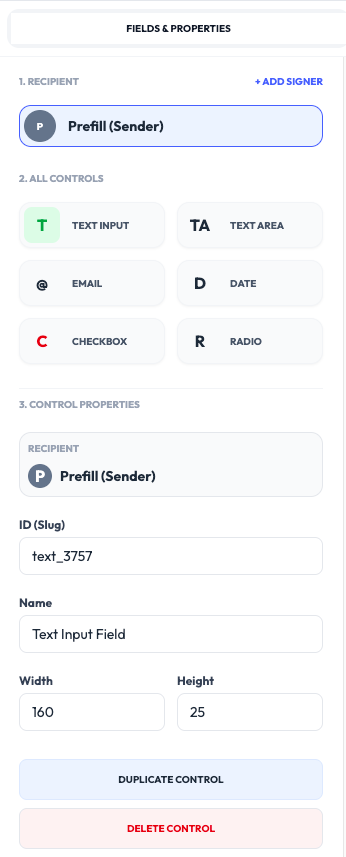
See Configure Fields.
4. Use fields for prefilled information
Fields can also be used to hold information that you provide before sending a signing request.
For example, an Event Waiver template could have Venue and Event Date fields. When creating a signing request, you can prefill those fields with Boston and October 10, 2026, while using the same template for a different event with different values.
See Prefill Fields.
5. Duplicate or remove fields
When a field is selected, you can use the available actions to:
- Duplicate Control: create another field with the same configuration.
- Delete Control: remove the selected field from the template.
A well-prepared template
Before using a template for signing, make sure:
- All required fields have been added.
- Each field is assigned to the correct signer.
- Fields are correctly positioned and aligned.
- Required fields are marked appropriately.
- Field visibility is configured where multiple signers are involved.
- Fields that need sender-provided information can be prefilled.
Once the required signing setup is complete, the template becomes Fillable and can be used to create signing requests.